

As with over 50% of the population, I am someone who suffers from frequent headaches. In fact, in typing this I have a bit of an ache just behind my eyes.
My mom always says I have a "Barometer Head" which means I get headaches whenever the atmospheric pressure changes, but I can assure you, this little headache is self-induced and caused by a visit to a local cocktail bar last night.
Either way! I have always felt relief from a cool compress on my eyes, but a wet washcloth is always a bit messy, doesn't stay cold long enough and I inevitably fall asleep and wake up several hours later on a wet spot....ok, so that sounds bad, but you know what I mean!

I was hoping to create my own scaled-down version of the Magic Bag, which is a popular brand of thermotherapeutic compress that can either be cooled in the freezer or heated in the microwave.
With a quick search on Google, I found that you can stuff this type of pillow with an assortment of fillings including dried peas, wheat, barley, rice, flaxseed, cherry pits, crushed walnuts and more! I already had a bunch of short-grain rice in my cupboard so I decided to use that. It's important to know that you can't wash the bag if it is filled with rice, so I designed a little envelope style cover to go over it that you can take off and wash when necessary! 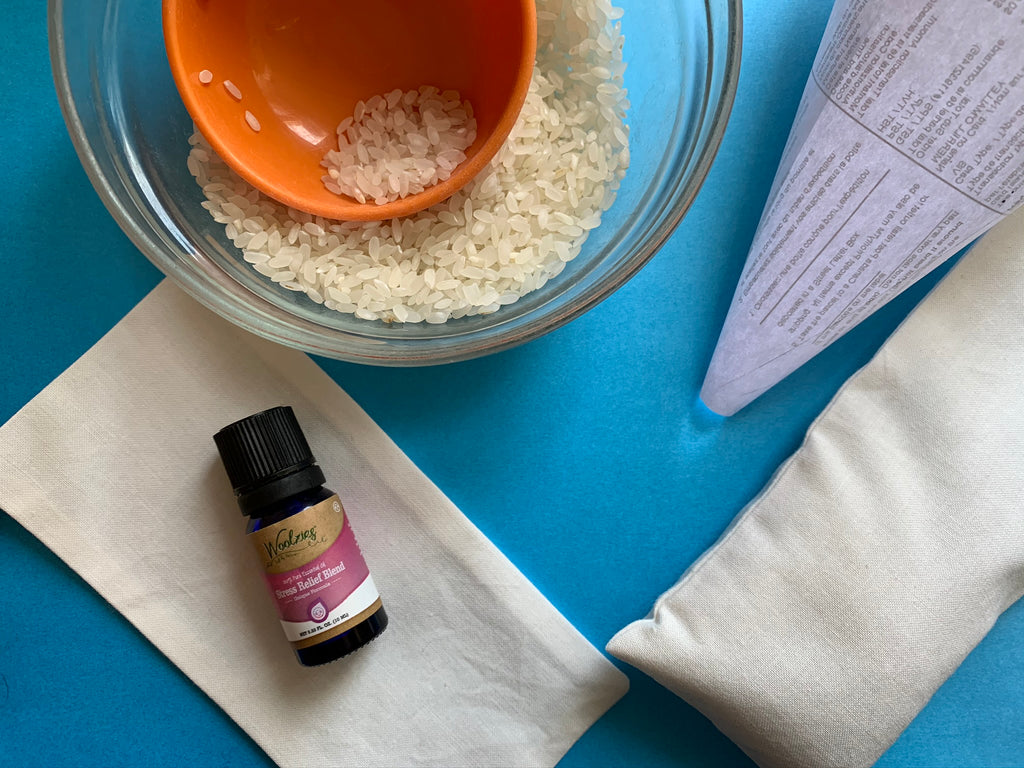 I made a few at once and since this is a scrap-busting project so I chose to use a scrap of this organic cotton muslin for the inner rice bag and for the outer fabric I used a cute little scrap of dog fabric as well as scraps of stonewashed linen from my unlined Wiksten Haori below that I sewed in January.

 Ok, so let's make one!
Here's what you will need:
- 1 rectangle of fabric 4" x 14" for the inner bag
- 1 rectangle of fabric 4" x 16" for the outer bag
- 1/2c of rice ( or any of the aforementioned fillers)
- essential oils (optional) - try lavender for relaxation or peppermint for tension.

First, we will make the inner bag, and this couldn't be more simple.
- Fold your rectangle in half, right sides together so that the short ends are aligned and pin.

- With a 1/4" seam allowance, sew along all edges, leaving a 1" opening at the short end for turning later.

- Trim your corners and turn right side out.
TIP: Iron back your seam allowances at the opening BEFORE you turn the pouch right side out so that you have a nice clean finish and even edges.


- In a bowl, stir 1/2 cup of rice with 1-3 drops of essential oils of your choice. I happened to have a little bottle of essential oils hanging around called "Head Ease" which is a blend of basil, eucalyptus, sweet marjoram, frankincense, lavender, peppermint, and rosemary. Of course, this step is optional, and I know in a lot of cases, scents can actually aggravate a headache so be sparing!

- Using a funnel or piece of paper rolled up, fill your pouch with rice mixture.

- Sew the opening closed, close to the edge. You can sew this closed by hand if you don't want your stitching to show, but this will be covered so I chose to close it by machine. Set aside!

That is it for the inner rice pillow! Make sure you don't over-fill your pouch because you want it to stay flexible so that the contents can conform to your eyes!
Now we will make the outer cover which is just as simple. This would be a good place to use up any scrap pieces of silk or sateen for a really luxurious feel!
- On each short end of your outer fabric, fold down the edge by 1/4" to the wrong side and press. Fold over 1/4" a second time and stitch close to the first fold to create a hem.

- Fold one short end over to the right side by 1 1/4" and pin in place.
- Fold the other end up to match the folded edge with right sides together and pin. I like to offset this by about 1/8" so that when you fold it all to the inside, everything lies nice and flat.
- With a 1/4" seam allowance, stitch along both long edges through all layers.
- Finish your seams either by serging, zig-zagging or using pinking shears.


- Turn your cover right side out and slip your filled rice bag. Fold the outer flap over to enclose the end.

- Place the cooling pack in the freezer for at least 30 minutes. Lie back, place your cooled pillow on your sore head and feel your head pain melt away!

This pack can also be heated in the microwave in 10-second intervals until it reaches your desired temperature and used for muscle pain, menstrual cramps or just as a cozy heat pad. Try making an extra long one that can be wrapped around your sore neck and shoulders for tension headaches! The possibilities are endless when you make your own stuff! Isn't sewing the best?
Thanks for stopping by! xo M
2 comments
第一借錢網擁有全台最多的借錢資訊
https://168cash.com.tw/
Thx for this. Clear and simple directions. I need this as well, as I am the in house barometer here!