

Quick Summary
Flat felled seams are sewn by stitching two pieces together, pressing the seam allowance to one side, trimming one side narrower, folding the wider allowance over it, and topstitching close to the fold. The seam allowance is usually about 1.5 cm (5/8 inch). This encloses the raw edges and makes the seam strong for denim and workwear.
- Use a seam allowance of about 1.5 cm (5/8 inch), or follow your pattern's measurement.
- Trim one side of the seam allowance to about half its width before folding.
- Use a longer straight stitch so the topstitching holds layers firmly.
- Shorten the stitch and baste curved folds to keep the topstitching even.
- Choose a French seam instead for lightweight fabrics where bulk must stay low.
Table of Contents
- What a Flat Felled Seam Is and Why It Lasts
- Tools, Materials and Seam Allowance You Need
- Step-by-Step: Sewing a Flat Felled Seam on a Sewing Machine
- Sewing Flat Felled Seams on Curves
- Flat Felled Seam vs French Seam: Which to Choose
- Fabric Choices, Machine Feet and Fixing Common Mistakes
- Start Your Next Durable Garment With Simplifi Fabric
- Frequently Asked Questions
What a Flat Felled Seam Is and Why It Lasts
A flat felled seam is a strong, enclosed seam where both raw edges are tucked inside and stitched flat against the fabric. Sewers use it on denim, shirting and workwear because it hides raw edges and holds up to repeated washing and wear. Simplifi Fabric carries sustainable fabrics and indie patterns, such as the Fairfield Button-Up Shirt, that call for this seam.
The seam lasts because it has no exposed edges to fray. Two rows of stitching sit on the fabric, and the folded allowance adds layers of thread and cloth. That extra strength is why many pattern designers specify it for shirt side seams, trouser inseams and jacket seams.
Watch out: the flat felled seam is a sewing technique, so it works best when you plan the seam allowance before you cut.
Tools, Materials and Seam Allowance You Need
You need a sewing machine, a straight stitch foot, sharp scissors, pins or clips, an iron and matching thread. A longer straight stitch keeps the seam smooth.
Most flat felled seams use a seam allowance of about 1.5 cm (5/8 inch) on each piece. Check your pattern, because the allowance can change how the seam folds. Pattern instructions usually list the exact measurement, and that is the number to follow. You can also read How to Finish Raw Edges on Linen Without a Serger for alternative edge finishes.
- Sharp scissors for clean cuts
- A straight stitch foot and needle plate
- Pins, clips or a fabric glue stick
- An iron with a clean, dry pressing surface
- Thread that matches your fabric weight
Step-by-Step: Sewing a Flat Felled Seam on a Sewing Machine
Start with two pieces of fabric with their wrong sides facing up. Stitch them together with a seam allowance and press the seam open. This first seam is the base for everything that follows.
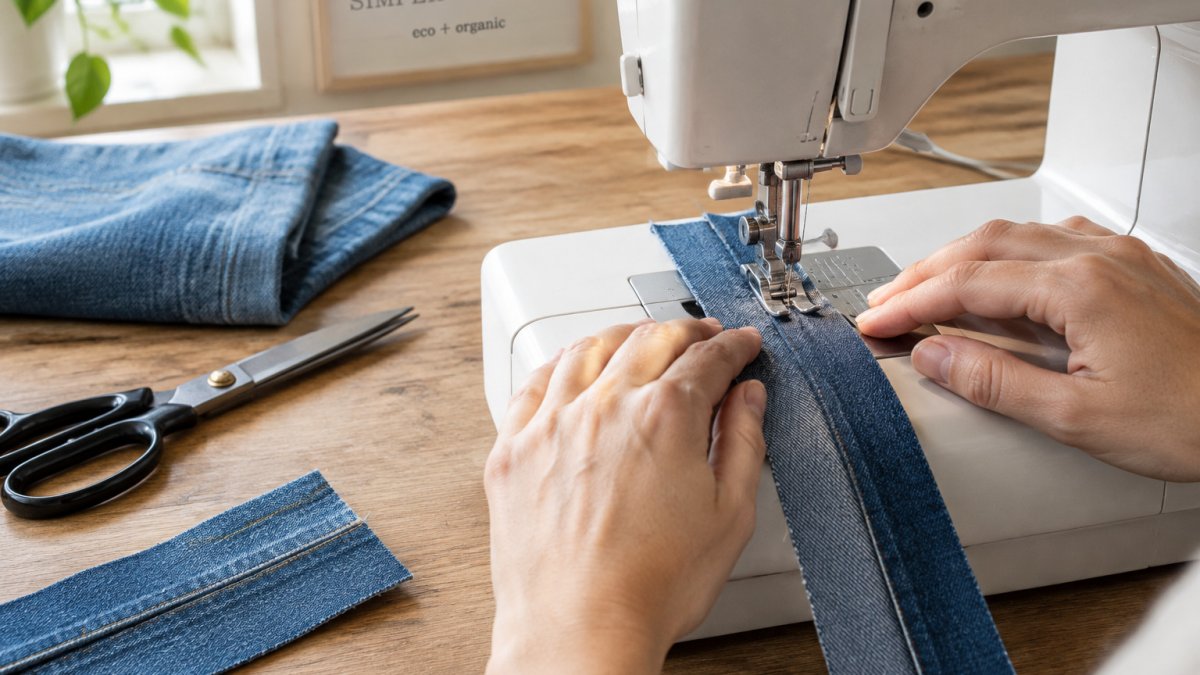
Trimming and Folding the First Seam
Trim one side of the seam allowance to about half its width. Then fold the wider allowance over the narrow one, and press it flat so the raw edge sits under the fold. A clean fold here makes the second row of stitching much easier.
Pressing matters more than most beginners expect. A crisp fold keeps the finished seam smooth and flat, so spend a little extra time with the iron.
Topstitching for a Crisp, Durable Finish
Fold the seam over so the wider allowance covers the narrow one, then stitch close to the fold. This second row of stitching locks the raw edges inside and gives the seam its finished look. Keep your stitch line even, and check the back to make sure no raw edge peeks out.
Use a longer stitch length so the thread holds the layers firmly, and test on a scrap of your fabric first.
Sewing Flat Felled Seams on Curves
Curved flat felled seams are where most guides go quiet, and that silence is a gap worth filling. The seam can work on gentle curves (a shirt yoke, a curved pocket bag, a slightly shaped side seam), but it fails on tight curves because the wider allowance cannot fold without rippling. The practical limit is roughly a 15 cm (6 inch) radius; tighter than that, switch to a different seam or a bound finish.
The mechanics of folding a curve
On a convex curve (the outer edge of a yoke), the wider allowance wants to stretch. On a concave curve (an armhole or a neckline), it wants to bunch. The fix is the same in principle but opposite in execution: on convex curves, clip the wider allowance at intervals of about 1 cm (3/8 inch) up to the fold line so it can spread; on concave curves, make small V-notches instead of straight clips so the fabric can overlap without bulk. Press the fold in short sections, letting the iron follow the curve rather than dragging across it.
Basting is not optional here
Hand-baste or glue-baste the fold before topstitching. A curved fold has no straight grain to guide it, and the machine will push the allowance sideways as you sew. Basting holds the fold at the width you set, so the topstitching follows the curve instead of wandering. Use a contrasting thread so the basting is easy to remove.
Machine settings and foot choice
Shorten the stitch on curves, since a long stitch cannot negotiate the changing direction of the fold. A standard foot works if you watch the fold, but an edge-joining foot with a guide blade is more reliable because it keeps the topstitching parallel to the fold as the curve turns. Reduce speed and stop with the needle down at each clip or notch to pivot slightly.
When to abandon the flat felled seam on a curve
If the curve is tighter than about a 15 cm (6 inch) radius, or if the fabric is lightweight and the fold ripples no matter how you clip it, a French seam or a bound seam gives a cleaner result. A flat felled seam on a tight curve adds bulk exactly where a garment needs to lie flat, and the durability gain is not worth the distortion. Choosing a seam that follows the curve without adding bulk keeps the garment smooth, and Teecraftsmarket can help you carry that same care into other sewing projects.
Watch out: Clipping too deep on a concave curve severs the seam allowance and the seam will pull apart in wear, so keep clips to half the allowance width.
Flat Felled Seam vs French Seam: Which to Choose
A flat felled seam is strong and sturdy, while a French seam is softer and more delicate. Choose a flat felled seam for workwear, denim or anything that will see hard use. Choose a French seam for lightweight fabrics, sheer blouses or garments where a neat inside finish matters.
Both seams enclose the raw edges, but they handle stress differently. A flat felled seam gives more strength, so it suits heavier cloth. A French seam works better where bulk must stay low.
Fabric Choices, Machine Feet and Fixing Common Mistakes
Flat felled seams behave differently across fabric weights, and the adjustments you make at the machine determine whether the seam lies flat or fights you. Most guides stop at "test on a scrap," but the real variables are fabric weight, machine foot choice, and how you diagnose a failed seam.
Fabric-specific adjustments
Heavy denim and canvas: These fabrics need a longer stitch and a sturdier needle to penetrate multiple layers without deflecting. A walking foot or dual-feed system helps feed the bulky fold evenly.
Midweight shirting and workwear cotton: A standard needle and a moderate stitch length are usually sufficient. The main risk is puckering along the topstitching, so shorten the stitch slightly if the fabric draws up.
Lightweight fabrics (voile, lawn, lining): Flat felled seams can add unwanted bulk here. Trim the seam allowance narrower before folding, use a fine needle, and shorten the stitch. A tear-away stabilizer under the fold can prevent tunneling. If the fabric still puckers, a French seam is often the better choice.
Machine feet: standard vs. specialized
A standard straight stitch foot works for most flat felled seams, but it gives you no physical guide for the fold. An edge-joining or stitch-in-the-ditch foot has a metal blade that rides the fold, keeping your topstitching a consistent distance from the edge. A compensating foot (sometimes called a felling foot) has a scroll that folds the fabric as you sew, which is useful for production-style felling but has a learning curve on curves. A walking foot is not a felling foot, but it is the most practical upgrade for thick denim because it feeds all layers at the same rate and reduces skipped stitches.
Troubleshooting common mistakes
Uneven fold width: The trimmed allowance was not measured against the wider one. Trim it consistently narrower than the wider side before pressing.
Tunneling (the topstitching sinks between layers): The stitch is too long for the fabric weight, or the presser foot pressure is too high. Shorten the stitch and test on a scrap with the same number of layers.
Skipped stitches on thick seams: The needle is too fine or the machine is deflecting off the bulk. Switch to a larger needle and hand-turn the flywheel through the thickest crossing.
Raw edge peeking out after topstitching: The fold was not pressed deep enough, or the topstitching wandered. Re-press the fold with a clapper or a heavy iron, and use a foot with a guide blade.
Wavy seam after washing: The thread tension was too tight or the fabric was not pre-shrunk. Pre-wash both fabric and thread, and check that the seam lies flat before topstitching.
Watch out: A seam that looks flat off the machine can pucker after the first wash if the thread and fabric shrink at different rates, so pre-shrink your fabric before you sew.
Start Your Next Durable Garment With Simplifi Fabric
Once you understand the flat felled seam, you are ready to sew a garment built to last. The Fairfield Button-Up Shirt Mens PDF Sewing Pattern from Simplifi Fabric includes a detailed instruction booklet with step-by-step instructions and diagrams to guide you through the sewing process. Browse Simplifi Fabric's sustainable textiles and indie patterns to find fabric and a pattern that suit your next project, and shop the collection to start sewing with materials you can feel good about. You can also get the Fairfield Button-Up Shirt Mens PDF Sewing Pattern from our shop.

Frequently Asked Questions
What is a flat felled seam?
A flat felled seam is a two-step seam that encloses both raw edges inside a neat, flat channel. You sew the seam, trim one seam allowance, fold the wider allowance over the narrower one, and topstitch close to the fold. The result is strong, lies flat, and resists fraying, which is why it is traditionally used on jeans, work shirts and other garments that get heavy wear.
Which side of a flat felled seam should face out?
The topstitching shows on the right side of the garment, so the seam is designed to be seen from the outside. Sew the first seam with wrong sides together, then fold and topstitch from the right side. Check your pattern instructions, since some designs place the felled seam on the inside for a cleaner outer look.
Can you sew a flat felled seam with a regular sewing machine?
Yes. A standard sewing machine with a straight stitch and a presser foot is all you need. A longer stitch length is commonly suggested for the topstitching, so test on a scrap of your fabric first. A specialty felling foot is helpful but not required.
Are flat felled seams stronger than French seams?
Flat felled seams are generally considered more durable for garments under stress, because the folded allowances add layers and topstitching holds them firmly. French seams give a cleaner look on sheer or lightweight fabrics and are simpler to sew. Choose the flat felled seam for sturdy fabrics like denim, and the French seam for delicate ones.
